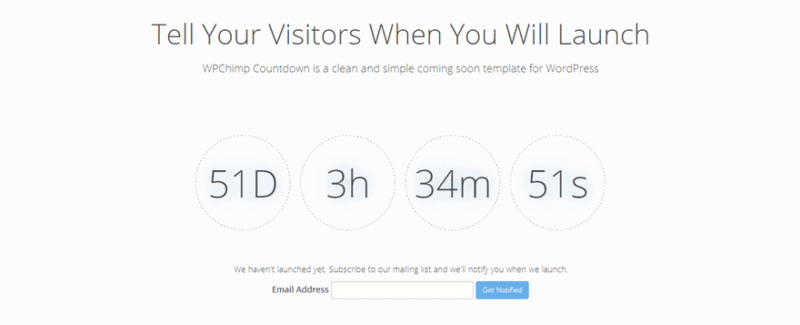
A clean, simple and responsive coming soon theme. It provides a countdown timer and you can add a form for users to sign up to your mailing list.
TL;DR: Get WPChimp Countdown from the WordPress Theme Directory.
Why a Launch Theme?
Whenever you launch a new product or project you should put up a landing page before the actual launch.
This lets you start your marketing efforts early, before launch, and have some place to drive visitors to.
Having a landing page is great, but any visitors that you get, who might be interested in your future product, will most likely forget it by the time you launch. The solution is to gather emails into a launch list and keep interacting with the people who sign up.
Our Countdown Theme for WordPress
WPChimp Countown is a coming soon theme that provides a countdown timer and allows visitors to sign up to your mailing list.
The theme is responsive and will work on any device.
You can still have pages and posts like a regular blog and you can create a microsite for your product just by using this theme. Do this and you will have a head start with your SEO at launch.
The theme is highly configurable; you can set the launch date, change any text on the landing page, change colors, configure all the menus and use widgets on multiple sidebars.
You can also localize the theme, it is ready to be translated.
Setting up the landing page
When you install the theme, it will offer you the choice to let it autoconfigure everything you need. You can also follow the steps below and achieve the same thing.
You will need to use a static front page for the landing page to work. You can do this in two easy steps, like below.
Step 1 – Set up the static pages
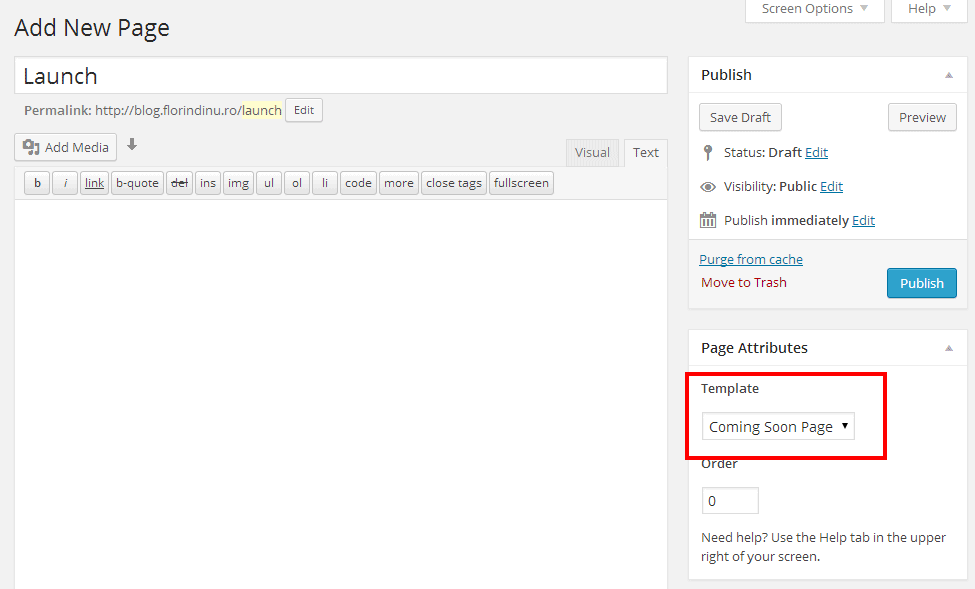
Create two empty pages, call the first one “Launch” and the second one “Blog” (you can give them other names).
For the “Launch” page choose the “Coming Soon Page” template and for the “Blog” page, leave the default page template.
Step 2 – Configure WordPress to use static pages
Go to Appearence / Customize / Static Front Page and for the “Front Page Displays” option, choose “A static page”. Two dropdowns should appear when you do this.
In the “Front page” dropdown, choose the “Launch” page from the previous step and in the “Posts” page, choose the “Blog” page.
Save the changes and you are done. All you have to do next is configure the landing page (see below) and set up your menus and other content.
Customization
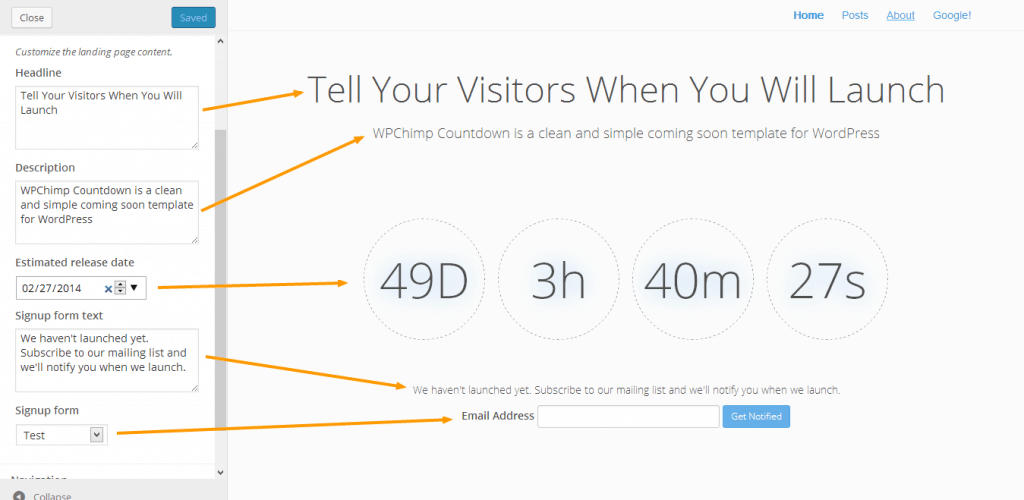
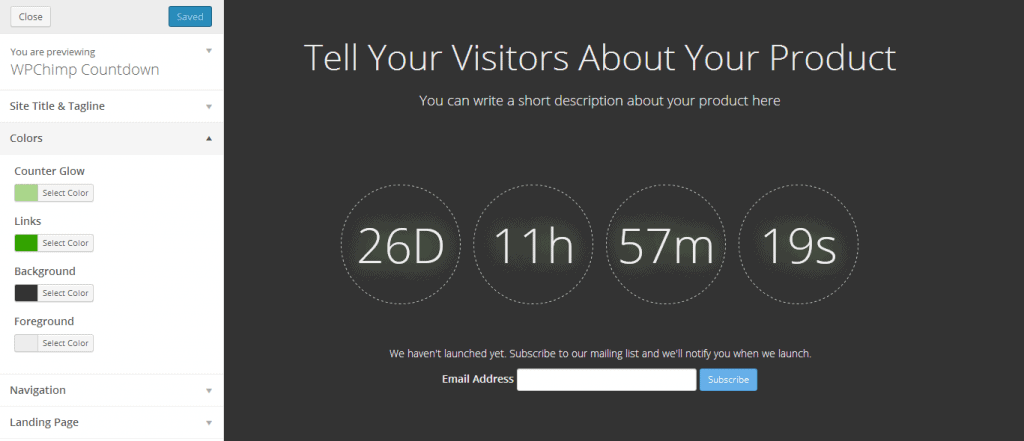
You can customize the landing page from the Appearance / Customize admin section. Check out the screenshots below.
With WPChimp installed:
Without WPChimp:
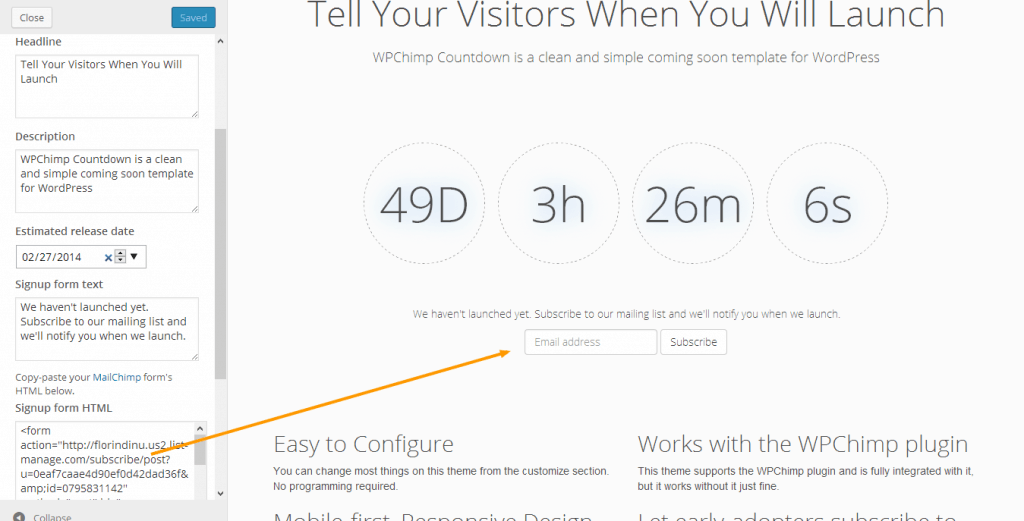
You change the colors to whatever you want:
Get it for Free
Get WPChimp Countdown from wordpress.org.
Rate It
If you’re using this theme and like it, please rate it on wordpress.org: https://wordpress.org/themes/wpchimp-countdown.
Check Out Our Plugin
WPChimp Countdown integrates seamlessly with our WPChimp plugin. If you’re using MailChimp, check out the plugin and save time setting up your forms.
